Blog

  • Working with brands transparently

    Working with Brands Transparently: Our Team’s Promise to You

    Last Tuesday, a beautifully wrapped parcel landed on our doorstep. Inside was a handbag we’d quietly admired during London Fashion Week—butter-soft leather, impeccable stitching. The accompanying note was flattering: the brand loved our content and wanted us to feature it. No strings attached, they said. Just a gift. Our team sat around the kitchen table, genuinely torn. That handbag represented everything we love about fashion, yet accepting it meant navigating the delicate line between opportunity and obligation. If we featured it, would you trust our verdict? That moment of tension is exactly why we’ve built the transparency framework we’re sharing today.

    Why Radical Transparency Matters in the UK Beauty Scene

    We’ve watched the British beauty and fashion landscape transform dramatically. What was once a relaxed space now operates under proper regulatory scrutiny, and honestly, we’re here for it. The days of influencers quietly pocketing fees while pretending to adore a product are fading, replaced by a culture where audiences demand clarity. In the UK, this shift isn’t just about ethics—it’s about law. The ASA UK influencer guidelines now require clear labelling of paid partnerships and gifted items. We remember the fallout from an undisclosed ad scandal tied to a major Oxford Street launch—trust evaporated overnight. For our team, the ASA crackdown isn’t an annoyance; it’s a framework we genuinely support. It protects readers from content masquerading as independent opinion.

    We’ve learned that precision matters. When we mark something as ‘gifted’, we’re telling you the product was sent without payment, but we chose to feature it because we genuinely rate it. When we label content as ‘paid’, we’re acknowledging a commercial agreement. This distinction might seem minor, but our readers tell us it makes a world of difference. You’ve shared that seeing ‘gifted’ helps you weigh our enthusiasm appropriately. That nuanced honesty has sparked deeper conversations in our comments section and increased engagement on sponsored posts. When people trust the label, they trust the content.

    Our ‘No Surprises’ Vetting Process

    Before a single contract is signed, every potential collaboration passes through a vetting process we’ve refined over years. We don’t believe in surprises—not for us, and certainly not for you. Here’s how it works:

    • Sustainability questionnaire: Every brand receives detailed questions about material sourcing, factory conditions, carbon offset programmes, and product recyclability. Some indie labels have told us our questions prompted them to formalise policies they’d only discussed informally.
    • Two-week testing minimum: We physically test every beauty product for at least a fortnight. For skincare, that allows us to observe reactions through a full cycle. For fashion, we wear pieces across different settings—commuting, working, an evening out.
    • Claims verification: If a brand makes specific clinical claims, we ask for data. When a luxury skincare line couldn’t provide evidence backing their retinol percentage, we walked away.
    • Values alignment check: We assess whether the collaboration genuinely serves our audience. Brands that can’t answer substantively don’t progress.

    This approach has cost us financially in the short term, but it’s protected our platform’s integrity in ways money can’t measure.

    Decoding the Money Talk: Affiliates, Flat Fees, and Gifting

    Money conversations can feel awkward, but they’re essential to transparency. We want you to understand exactly how Jenn Chan Glam generates revenue, because that knowledge helps you interpret our recommendations.

    • Flat fees: When a brand pays a flat fee, they’re compensating our time and creativity. Crucially, we retain total creative control. Brands can suggest key messages, but the final content belongs to us. We’ve turned down lucrative offers from brands who demanded script approval.
    • Affiliate links: Through platforms like LTK, we earn a small commission when you purchase via our links, at no extra cost to you. We only link to products we’ve genuinely recommended. We don’t swap links into old posts or chase higher commission rates.
    • Gifted products: Items sent without payment are clearly labelled. Products we don’t feature are donated to women’s shelters or beauty banks across London. We never sell gifted items.

    Affiliate income helps keep our blog largely free of intrusive display advertising, creating a better reading experience for everyone.

    When We Say ‘No’ to a Luxury Beauty Brand

    We decline more collaborations than we accept. Some of our most memorable rejections involve luxury names you’d instantly recognise, and those decisions have shaped our reputation more than any sponsored post ever could.

    Red flags we watch for include contracts requiring us to disparage competitors, clauses demanding we never mention negative side effects, and agreements restricting us from working with similar brands for unreasonably long periods. We once received a contract from a Harrods-stocked skincare line claiming clinical-grade results. When we asked for the data, the brand went quiet. We walked away. Our primary responsibility is to you, not to a brand’s marketing department. We’d rather publish one honest review acknowledging limitations than ten glowing endorsements that set readers up for disappointment.

    The Real Metrics We Share with Collaborators

    Media kits are polished highlight reels, and we’ve always found them slightly disingenuous. When we discuss partnerships, we share raw analytics screenshots pulled directly from our platforms.

    • Engagement rate deep dives: We break down saves, shares, meaningful comments, and click-through rates rather than relying on follower counts.
    • Honest historical data: We show brands how our audience actually interacts with content, including posts that underperformed.
    • Realistic projections: When a sustainable swimwear brand approached us in January, we shared honest low-traffic data and suggested a phased campaign. The resulting collaboration outperformed their previous influencer work and is now entering its third year.

    We’d rather have 1,000 readers who trust us implicitly than 100,000 who scroll past without a second thought.

    Your Right to an Honest Scroll

    We design our content assuming you’re savvy, discerning, and deserve immediate clarity. No hiding disclosures in hashtag swamps, no burying ‘ad’ in a sea of emojis. Our visual transparency system is intentional and consistent.

    On Jenn Chan Glam, commercial content carries bold disclaimers positioned at the top of every post, before any product mentions. We use in-image text overlays that clearly state the nature of the partnership. If a post is sponsored, you’ll know within the first three seconds of landing on the page. We genuinely want you to challenge us. If a recommendation feels off, if a product doesn’t live up to our review—tell us. We’ve updated reviews based on reader feedback, added caveats when multiple people reported different experiences, and occasionally removed products entirely when consistent issues emerged. Accountability isn’t a one-time promise; it’s an ongoing practice.

    Transparency has never felt like a legal burden or a box-ticking exercise. It’s the foundation upon which Jenn Chan Glam exists. Every disclosure label, every declined contract, every raw analytics screenshot represents a conscious choice to prioritise your trust over short-term gain. We’ve built this corner of the internet with the belief that fashion, beauty, and lifestyle content can be both commercially viable and genuinely honest. The two aren’t mutually exclusive—they’re mutually reinforcing. We invite you to hold us to that standard, in the comments, in our DMs, and in every scroll through our pages.

    FAQ

    How do you decide which brands to work with?

    We evaluate brands against our sustainability questionnaire, test products for at least two weeks, and assess whether the collaboration genuinely serves our audience’s interests.

    Do you keep gifted products you don’t feature?

    Products we don’t feature are donated to women’s shelters or beauty banks across London. We never sell gifted items.

    How can I tell if a post is sponsored?

    Sponsored posts feature bold disclaimers at the top of the page and in-image text overlays. We clearly label gifted items versus paid partnerships.

    Do affiliate links affect your product recommendations?

    No. We only link to products we’ve genuinely recommended. Commission rates don’t influence our selections.

    What happens when a product you recommended doesn’t work for me?

    We encourage you to share your experience. Beauty and fashion are personal, and we update reviews when consistent feedback patterns emerge from our community.

  • Skincare layering: order and spacing

    The Art of Skincare Layering: Order and Optimal Spacing

    Your alarm didn’t go off, you’ve got precisely seven minutes to get out the door, and the serum that promised a glow is now rolling off your cheeks in tiny sticky balls. We have all been there, staring at a mirror, wondering if anything actually sank in or if we just spent the morning marbling expensive goo together. Pilling is the skincare equivalent of a passive-aggressive note from your face, telling you the sequence was wrong. The question is not just “what” you apply, but “when” you apply it and how long you leave between each step. Master this, and you stop fighting your products; you start orchestrating them.

    Why the Sequence of Your Skincare Routine Matters

    Think of your skin like a multi-storey car park with a strict entrance policy. If you send a heavy lorry of a cream down first, the sleek sports car serums full of antioxidants cannot get past. The order of application determines what actually reaches the living layers where collagen is produced and free radical damage is halted. Getting this wrong doesn’t just waste money; it can contribute to congestion, milia, and a frustrating lack of results.

    Understanding Product Penetration and Molecular Weight

    Formulas aren’t just random liquids; they have distinct molecular sizes. Lightweight, watery molecules from essences and thin serums are small enough to slip through the lipid barrier quickly. Thicker molecules found in oils and occlusive creams cannot navigate these pathways easily and instead sit on top to seal in moisture. When you apply a heavy face oil first, you create an impassable seal, locking out any active ingredient that follows. This is why a rigid adherence to viscosity matters far more than brand loyalty.

    The Golden Rule: Water Before Oil

    The simplest way to remember the science is the “water before oil” mantra. Water-soluble ingredients (think humectants like glycerin and hyaluronic acid) need to be close to the skin’s surface to pull in moisture. Oil-based or lipid-soluble ingredients are designed to prevent that moisture from evaporating. If oil goes first, water literally cannot break through to do its job. In a clinical sense, this rule governs everything from a basic moisturiser sandwich to a highly concentrated vitamin C protocol.

    The Definitive Daytime Layering Order

    Your morning routine is a shield. It prepares the skin for oxidative stress, ultraviolet radiation, and pollution while keeping your makeup looking like skin, not a cracked canvas. These steps build upon one another without unnecessary waiting, getting you through rush hour efficiently.

    Step 1: Gentle Water-Based Cleanser

    You don’t need military-grade foam. A gentle water-based cleanser removes overnight sebum and leftover evening products without stripping the acid mantle. If your face feels tight after washing, you have already compromised your barrier before the actives have even arrived.

    Step 2: Watery Toners and Essences

    Immediately on damp skin, press in a hydrating toner or essence. This step lowers the pH slightly, reduces transepidermal water loss, and cracks the window open for the heavy hitters coming next. Avoid astringent alcohol bases here; you want hydration, not evaporation.

    Step 3: Targeted Treatment Serums

    This is where your antioxidant shield is built. We consistently reach for a pure ascorbic acid vitamin C serum at the top of this step. SkinCeuticals C E Ferulic is our benchmark here because the synergistic blend of L-ascorbic acid, alpha-tocopherol, and ferulic acid provides photoprotection that is remarkably stable. Wait just long enough for the serum to lose its slickness before moving on.

    Step 4: Eye Cream and Moisturiser

    The orbital area has fewer oil glands; treat it delicately with a tapping motion, never a drag. Then seal the face with a lightweight, non-comedogenic moisturiser. You aren’t looking for deep emollience here, just a flexible film to hold everything in place.

    Step 5: The Non-Negotiable Sunscreen

    SPF is the final word in skincare. It must sit on top to form an even film—anything layered over it will disrupt that shield. We use a generous two-finger-length amount of Altruist Dermatologist Sunscreen SPF 50. It offers high PPD protection without white cast and sits beautifully over a layered routine without sliding. Skip this step, and you’re simply Photoshopping a damaged structure.

    The Definitive Nighttime Layering Order

    While the morning routine is protective, the evening is reparative. The skin’s permeability increases at night, and cell turnover speeds up. This is the window where you don’t have to balance against makeup, so you can truly lean into transformation.

    The Double Cleanse: Oil-Based Balm Followed by Water-Based Wash

    Sun filters, sebum, and pollution particles are lipid-loving—they stick to oil. The first cleanse with a balm is non-negotiable. We emulsify ELEMIS Pro-Collagen Cleansing Balm over dry skin, massaging it to lift every bit of stubborn mascara and sunscreen. After rinsing with a warm cloth, a gentle water-based wash follows to clear any residue and prep the skin for actives. This is the foundation of a calm, breakout-free canvas.

    Exfoliating Acids and Retinoid Application Timing

    This is the “flashing amber” section of the routine. You want rapid cell renewal, but you need to manage the traffic. After the skin is dry (to reduce irritation), apply exfoliating acids or a vitamin A derivative. We navigate this with Medik8 Crystal Retinal, a retinaldehyde formula that delivers results with less enzymatic conversion than retinol. Apply it directly to dry skin; do not sandwich it between watery layers unless your barrier is particularly reactive. The speed of retinaldehyde means you see clarity and firmness without as much peeling, but spacing from acidic toners is still critical.

    How Long to Wait Between Skincare Layers

    We have all heard the rigid advice: wait thirty minutes or everything neutralises itself. The reality is far more nuanced and mercifully faster. For thin, watery essences, the “pat and go” method works beautifully—once the skin feels tacky rather than wet, the next layer can land. For oil-based treatments or thick creams, waiting until the product loses its slip on the skin is sufficient. Complete dryness is only required when you are dealing with pH-dependent actives. A fully dried acid layer prevents a retinoid from being driven too deep too fast, minimising irritation without waiting for an entire episode of your current boxset.

    The ‘Damp Skin’ Debate: Hydration vs. Irritation

    Applying humectants like hyaluronic acid to damp skin is a rule we live by—it draws moisture into the epidermis, boosting plumpness. However, we never apply strong exfoliating acids or retinoids to damp skin. Water increases permeability, which for hydration is a gift; for resurfacing acids, it’s a express lane to a red, stinging face. Save damp application for your mists and toners, then press pause before the aggressive heroes.

    Navigating Conflicting Active Ingredients

    Layering isn’t just about texture; it’s about chemistry. Mixing benzoyl peroxide and retinoid, or combining low-pH exfoliants with peptides, can render your expensive products inert—or worse, set your face on fire. The modern solution that has gone from dermatology clinics to social media feeds is cyclical usage, known as “skin cycling.” It breaks the week into recovery and active nights, so your skin isn’t processing a chemical cocktail daily.

    Never Mix: Benzoyl Peroxide and Retinol

    Benzoyl peroxide is an oxidising agent. Oxidation literally disables retinoids, oxidising the molecule before it can convert to retinoic acid. You are left with zero anti-ageing action and a high potential for dryness. Use BP in the morning or on alternate nights entirely.

    How to Safely Use Niacinamide and Vitamin C Together

    Old myths claim niacinamide and ascorbic acid create a flushing reaction or cancel out. We find this largely a formulation stability issue rather than a skin disaster. We routinely layer a stable serum like The Ordinary Niacinamide 10% + Zinc 1% after an acidic vitamin C in the morning, but we allow a few minutes for the pH of the skin to reset naturally. If you notice warmth, simply wait longer. The combination is actually a powerhouse for brightening and pore refinement, provided you listen to your skin’s feedback.

    Our Team’s Ultimate Layering Hacks for a Flawless Finish

    We have refined these tricks over years of backstage fashion prep and clinical skincare deep dives. Small shifts in technique prevent the dreaded mid-afternoon pilling that ruins a sheer foundation.

    • Take it to the neck and décolletage. Every step that goes on your face should extend down. The neck ages faster and needs the same antioxidant and SPF protection.
    • Use a handheld fan to speed up dry time. A quick blast of cool air sets a layer in seconds without dragging towels or cotton pads across a delicate freshly applied formula.
    • Press, don’t rub. Pour product into the palm, press it into the skin with an open hand, and let body heat do the rest. Rubbing accelerates friction, which disrupts the even film you are trying to build.
    • Silicone-based moisturisers act as barriers. If you need one, know that nothing water-based will penetrate it afterwards, so ensure all actives are underneath.

    Preventing ‘Pilling’ Under Makeup

    Pilling happens when polymers, silicones, and high-molecular-weight hyaluronic acid ball up due to friction or incompatible bases. To avoid it, check your product bases: water-on-water, oil-on-oil. If you use a silicone-heavy primer, don’t place an oil-based serum underneath. And give your sunscreen a full five minutes to set. Our rule is simple: if you can glide a clean finger across your cheek without movement, you are ready for foundation. Patting foundation in with a cushion puff, rather than rubbing with a brush, keeps every layer intact underneath.

    Consistency and patience with a simplified routine will always outperform a complex, rushed ten-step process. You can own an entire apothecary of serums, but if you don’t pause to let them settle, your skin treats them like unwelcome noise. We encourage you to strip back to the essentials—cleanse, treat, moisturise, protect—then observe how your skin responds before adding extra targets. Beauty is a conversation, not a monologue. If your skin feels tight, ease up on the actives. If it glows, you’ve found your rhythm.

    FAQ

    Do I really need to wait for each layer to dry completely?

    Not for everything. For watery toners and essences, you just need the skin to feel tacky, not wet. For active serums, wait until the slip disappears—typically 30 to 90 seconds. Only for high-strength acids or retinoids applied to bare skin should you wait until the face feels bone-dry, which usually takes a couple of minutes. This prevents over-penetration and irritation without wasting your morning.

    Can I use my vitamin C serum right after washing my face?

    Yes, but after a hydrating toner or essence, not immediately on soaking-wet skin if you’re using a highly acidic L-ascorbic acid formula like SkinCeuticals C E Ferulic. A slightly damp canvas reduces the sting, but pure water can drive a low pH too deep too rapidly. Pat the face with a spritz of a simple hydrating mist, let that settle for a moment, then apply your antioxidant serum.

    Why does my moisturiser peel off in the morning no matter what I do?

    That’s pilling, and it usually means you’re combining incompatible product bases—an oil-based serum under a water-based gel cream, or a silicone-heavy sunscreen applied over a wet layer. Check the first ingredients of your serum, moisturiser, and SPF. If they clash, let each step set longer or switch one product. Pressing, not rubbing, also reduces the friction that starts the ball-up process.

    Is it safe to use niacinamide with retinol at night?

    Absolutely. Niacinamide is not acidic and actually helps calm the barrier, making it a brilliant partner for a retinoid like Medik8 Crystal Retinal. Apply your retinaldehyde first on dry skin, wait a few minutes, then layer a niacinamide serum or moisturiser on top. This buffers irritation without interfering with the conversion to retinoic acid, giving you a smoother, less angry retinoid experience.

    How often should I exfoliate if I follow a layering routine?

    That depends on your skin’s tolerance, but with a structured layering routine, we recommend exfoliating acids at most two to three nights a week. Over-exfoliating strips the barrier, making every product you layer afterwards sting. If you experience redness when applying a basic moisturiser, you have crossed the line from renewal to irritation, and it’s time to schedule more recovery nights where only gentle cleansing and moisture are used.

  • Home office lighting for video calls

    The Jenn Chan Glam Guide to Home Office Lighting for Video Calls

    If we had a pound for every time we logged onto a Teams call and winced at our own reflection—bruised-looking under-eye circles, a shadowy nose contour we didn’t ask for, and skin that somehow looks both flat and harsh—we’d have enough to hire a permanent lighting crew. The UK’s grey days have a lot to answer for, and frankly, so do our ceiling fixtures. Before you resign yourself to another season of apologising for “looking a bit tired,” let’s fix it. We’re going to transform your desk setup using clever positioning, a few affordable staples, and some seriously chic accessories that pull double duty when the laptop closes.

    Why Your Overhead John Lewis Pendant Is the Enemy

    We adore a sculptural John Lewis pendant for setting the mood during a cosy dinner party. For a video call, it’s actively sabotaging you. Relying on a single ceiling fixture is the fastest route to what we call “video call fatigue face.” The physics of a standard UK ceiling rose means light travels straight down, plunging your eye sockets into darkness, dragging shadows from your nose and chin, and highlighting forehead shine. It’s overhead lighting, not portrait lighting, and the camera never lies. A single downlight creates what cinematographers call “raccoon eyes”—your brow bone blocks light from reaching your eyes, making you look exhausted. The secret is diffusion. Hard, direct light creates razor-sharp shadow lines. Soft, diffused light wraps around the face, softening texture and creating an expensive-looking glow. A bare overhead pendant delivers the former, no matter how much we spent on the shade.

    Harnessing Natural Light Like a True Beauty Editor

    Artists and makeup gurus seek out north-facing windows for consistent, diffused light. In the UK, we have a meteorological cheat code: our near-constant overcast skies. Those layers of cloud act as one giant, free softbox, scattering light evenly. That blanket of soft grey is nature’s beauty filter, neutralising colour casts and minimising texture. The single most transformative, zero-cost change is moving your desk so you face the window. When a bright window sits behind you, your camera’s auto-exposure adjusts for that background, turning you into a faceless silhouette. Pull your desk right up to the glass, or position it perpendicular for a lovely side-light that sculpts the cheekbones. Your face should be the brightest thing in the frame.

    The Three-Point Artificial Setup on a Dobbies Budget

    When daylight fails us by mid-afternoon, we need to build our own sun. A professional three-point lighting setup sounds intimidating, but we’ve found ways to replicate it using clever, budget-friendly buys. The goal is a key light, a fill light, and an accent light that create dimension without costing a fortune.

    The key light is your primary source. Position it slightly above eye line and off to one side of your webcam. We love the Elgato Key Light Mini—a small, mountable LED panel offering adjustable brightness and colour temperature via an app. It provides clean, wrap-around light that mimics a bright window. The fill light gently lifts shadows on the opposite side of your face. Our favourite affordable hack is the IKEA TERTIAL work lamp with a daylight-balanced LED bulb. Clip a piece of baking paper over the head to diffuse the beam, banishing harsh jawline shadows for under £15. The accent light adds depth behind you. Aim a small directional spotlight at a trailing Devil’s Ivy or a statement Monstera to create a leafy silhouette on the wall. It adds visual interest and that coveted “curated Zoom room” depth.

    Screen Glow and the LED Colour Temperature Debate

    Your laptop screen is a giant, adjustable light panel we often forget to use deliberately. If you’re in a pinch with no fill light, open a blank Notepad or white document and maximise it. The glow reflecting up acts as an impromptu soft fill, lifting shadows under the chin. It’s a brilliant emergency trick, but mind the angle to avoid a ghostly, up-lit effect. Beyond screen hacks, understanding colour temperature measured in Kelvin is the difference between looking vibrant or looking like you’ve been marinated in turmeric. For video calls, we recommend a neutral white between 4000K and 5000K. If you have warm, golden undertones, lean towards 4000K. If your skin has cool, pinkish undertones, 5000K will look crisper. Avoid mixing temperatures in one setup, or the colour clash will be jarring on camera.

    Styling Your Background Lighting with Oliver Bonas Touches

    Lighting shouldn’t just be functional for calls; it should make your space feel like a sanctuary for the rest of the working day. Instead of a standard plastic ring light gathering dust, think about warm-toned string lights or a sculptural table lamp with a woven shade. A Himalayan salt lamp creates beautiful depth behind you on camera and doubles as a calming night light. Browse Oliver Bonas for a colourful velvet lampshade or a metallic-based accent lamp—these pieces look intentional and stylish in a wide-angle Zoom frame. Position a small light on a bookshelf behind you, tucked behind coffee table books and a trailing plant. The light will cast a soft halo and create silhouettes, giving the background a three-dimensional, editorial “shelfie” feel. This ensures your background looks intentionally curated without distracting from your face, which should always remain the brightest focal point.

    Conclusion

    Confidence on a video call doesn’t come from a new webcam alone; it comes from lighting that flatters, sculpts, and presents the most vibrant version of you. By ditching the harsh overhead pendant, befriending your window, and building a simple, stylish three-point system, you transform your daily on-screen presence from exhausted to luminous. Before your next big meeting, record a quick test video, play it back, and tweak your lights until you feel genuinely excited to turn your camera on. That glow is entirely achievable, and it starts right here.

    FAQ

    What is the best budget-friendly light for video calls?

    We consistently recommend the IKEA TERTIAL work lamp. Clamp it to your desk, fit it with a daylight-balanced LED bulb around 4500K, and diffuse the light by clipping baking paper over the head. It offers fully adjustable positioning for under £15.

    How do I stop my face looking yellow or washed out on camera?

    This is almost always a colour temperature problem. A bulb that’s too warm below 3000K will make you look yellow, while a very cool bulb above 6000K creates a blue, washed-out effect. Stick to a neutral white between 4000K and 5000K, and ensure all your light sources have a matching temperature.

    Is a north-facing window really better for lighting?

    Yes, especially in the UK. A north-facing window never receives direct, harsh sunlight, instead letting in consistent, soft, diffused light all day. The UK’s overcast weather turns the entire sky into a giant softbox that provides beautifully even illumination for your face.

    Can I use a Himalayan salt lamp as my only background light?

    A salt lamp is perfect as an accent to create depth and a warm atmosphere. However, it emits a very warm, orange-toned light and isn’t bright enough to serve as a key or fill light. Use it to style your shelfie silhouette, but pair it with a proper neutral white light source aimed at your face.

  • Event dressing on a budget

    How We Master Event Dressing on a Budget Without Sacrificing Style

    We’ve all been there, haven’t we? The WhatsApp message pings with a “Save the date!” for a wedding in six weeks, your best mate calls with a spare ticket to a gallery gala next Friday, or you suddenly remember the office summer party is this weekend and you’ve absolutely nothing to wear. The immediate panic, for us at least, is usually followed by the sinking feeling that looking effortlessly chic requires a bank account that can handle a Net-a-Porter spree. We’re here to tell you that’s a total myth. Over the years, our team has faced down countless RSVPs with a tight budget and a determination not to look like we raided the back of our teenage wardrobe. We’ve learned that a truly stunning event look isn’t about the price tag stitched inside your dress; it’s about clever planning, a good eye for a bargain, and the confidence to rock a high-street find like it’s fresh off the runway. Let us show you how we’ve cracked the code.

    Our Golden Rules for Budget-Friendly Event Style

    Before we even start hunting for a new outfit, we’ve got a little mental checklist we run through. Dressing for a big event on a budget isn’t just about finding the cheapest dress on the rack; it’s a whole mindset that saves us from panic-buying something we’ll never wear again. These are the non-negotiables we swear by, the principles that have saved us from countless “I have nothing to wear” meltdowns.

    Start with What You Already Own

    This sounds almost too simple, but honestly, it’s our most powerful tool. Before we type a single word into a search bar, we schedule a “wardrobe shop.” We pull everything out—and we mean everything. That bridesmaid dress from two years ago? It might look completely different with a sharp blazer thrown over it. The silky slip skirt we wear with chunky knits in winter? It’s an elegant evening piece when paired with a lace camisole and heels. We often find that we’ve got the perfect base piece hiding in plain sight, just needing a fresh pair of eyes and a new styling trick to feel completely reborn. This step alone has saved our team hundreds of pounds, turning a moment of panic into a fun, creative styling session.

    The High-Street Heroes We Rely On

    When we do need to buy something new, we don’t automatically think we need to visit a designer boutique. The British high street is absolutely incredible for event wear right now. Our team consistently scans ASOS for its vast range of tall, petite, and curve options that cater to every body shape. We also love H&M’s more premium-conscious lines for modern tailoring that looks far more expensive than it is. The key for us is to look for fabric blends that have a bit of weight to them—a heavier crepe or a structured scuba material photographs beautifully and hangs well, avoiding that flimsy look that can give a budget away.

    Why Fit Beats a Designer Tag Every Time

    We cannot stress this enough: the secret to looking expensive is impeccable fit. A £40 dress that’s been altered to skim your body perfectly will always, always look a million times better than a £400 designer piece that gapes at the bust or pulls at the hips. Our team has a standing relationship with a local tailor, and the £15 we spend to get a pair of high-street trousers hemmed or a dress waist taken in is the single best investment we make. It’s that sharp, custom-like silhouette that tricks the eye into thinking you’ve spent a fortune. Trust us, no one will ask who made your dress; they’ll just ask how you look so polished.

    Where We Hunt for Affordable Outfits in the UK

    Right, let’s get into the nitty-gritty. Once we’ve decided we actually do need a new piece, we don’t just wander aimlessly around a shopping centre. We hunt with a strategy, and we’ve got our favourite spots across the UK that rarely let us down. The thrill of the chase is half the fun, especially when you unearth a show-stopping piece for a fraction of what you expected to pay.

    High-Street Staples: Zara, River Island & Beyond

    Zara is often our first port of call for a more fashion-forward, trend-led event look. Their evening section is a goldmine for sleek silhouettes and interesting textures that punch well above their price point. River Island, on the other hand, is our secret weapon for weddings and races. They absolutely nail occasion wear with beautiful prints, flattering shapes, and a focus on detail that feels genuinely special. We’ve also got a soft spot for the in-house brands at John Lewis, particularly during their legendary clearance events where we’ve snapped up stunning occasion dresses for over 70% off. Our top timing tip is to shop the bank holiday sales; we mark our calendars for the May and August weekends when retailers slash prices on current-season stock.

    Second-Hand Gems on Vinted and Depop

    This is where our team has genuinely changed its shopping habits. Vinted has become our absolute obsession for finding brand-new or barely-worn event wear at jaw-dropping prices. We’ve sourced everything from a Phase Eight wedding guest dress for £20 to a Reformation linen midi for a summer party. The trick is to be specific with your searches—filter by brand, your size, and condition “new with tags” or “very good.” Depop is our go-to for more unique, vintage-inspired finds that guarantee no one else at the party will be wearing the same thing. It’s sustainable, it’s budget-friendly, and we get a little buzz from knowing we’ve outsmarted the full-price system.

    Rental Services We’re Loving Right Now

    For those events where we really want to make a statement—a black-tie gala or a very fancy wedding—but can’t justify a purchase, renting has been a complete game-changer. We’ve been loving platforms like Hurr and By Rotation, where we can borrow a dreamy Rixo dress or a cult Ganni number for a weekend for a fraction of the retail price. It scratches that itch for a designer label without the commitment or the guilt, and it’s a brilliant way to experiment with bolder styles we might be too nervous to buy outright.

    Accessories That Elevate Without the Price Tag

    We’ve learned that accessories are the fairy godmothers of budget event dressing—they have the magical ability to completely transform a simple, affordable outfit into something that looks curated and intentional. A plain black dress is just a canvas, and the right add-ons are the art. This is where we have the most fun, layering pieces to create a look that feels rich and personal.

    Statement Jewellery on a Shoestring

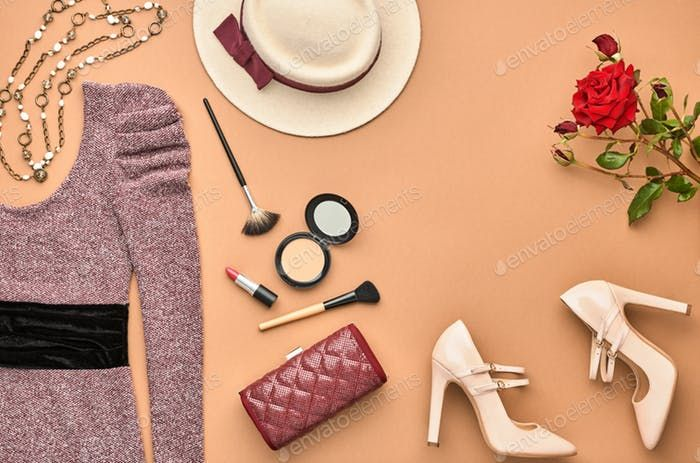
    Accessorize is our treasure trove for this. We’ve found that a pair of bold, architectural gold earrings or a chunky, crystal-embellished necklace from there can instantly make a simple high-street dress look like a million pounds. Our favourite trick is layering multiple delicate gold chains of different lengths to create a bespoke, luxe “neck mess” effect. We mix textures—a bit of pearl here, a bit of chain there—and suddenly, our Primark basics are looking incredibly high-end. The secret is choosing one focal point; if our earrings are huge, we skip the necklace and stack the bracelets instead.

    Bags and Shoes That Look the Part

    No one will guess your entire outfit cost less than a fancy dinner if your bag and shoes are on point. We tend to invest in one or two high-quality-looking, unbranded faux-leather bags in neutral tones—a sleek black clutch and a metallic envelope bag cover almost every eventuality. Primark’s premium range has genuinely impressed us with structured bags that look far more expensive than their £10 price tag. For shoes, we find that a pointed-toe flat or a block-heel sandal in a nude or metallic tone from the high street elongates the leg and looks effortlessly chic, without the pain of a stiletto we can’t walk in.

    The Power of a Well-Chosen Scarf or Wrap

    A beautiful scarf or a faux-fur stole draped over the shoulders is our ultimate styling hack for evening events or cooler-weather weddings. It adds instant old-Hollywood glamour and hides a multitude of sins if we’re feeling a bit self-conscious about our arms. We’ve found stunning satin and velvet options on the high street that can be artfully arranged and pinned with a vintage brooch for a completely unique, bespoke finish that gets compliments all night long.

    Beauty Tricks to Complete Your Event Look for Less

    An incredible outfit deserves a beauty look to match, but we refuse to believe that requires a trip to a professional makeup artist. Over years of getting ready in loos and on trains, our team has perfected a set of DIY beauty hacks using affordable, hardworking products that look flawless in photos and last from the first glass of fizz to the last dance. Our local Boots is essentially our personal beauty counter.

    Makeup That Stays Put All Night

    The foundation of any long-lasting look is, quite literally, a good primer and setting spray. We swear by the e.l.f. Power Grip Primer and the NYX Matte Finish Setting Spray, both from Boots, to lock everything in place. For a complexion that looks luminous but not greasy, we rely on the L’Oréal True Match foundation. And for concealing those late-night dark circles, the Collection Lasting Perfection concealer is a £5 miracle worker that our entire team has repurchased more times than we can count. A bold lip, applied with a matching liner all over the lips first, will outlast any dinner, and a sweep of a shimmery, affordable highlighter on the cheekbones catches the light beautifully in evening settings.

    Easy Updos and Hair Hacks

    We’ve watched enough YouTube tutorials to know that a “messy” chic updo is very achievable at home. Our go-to is the twisted low bun: we simply part our hair to one side, twist two sections back from the temples, and pin them into a low ponytail, which we then twist into a bun and secure. The trick to making it look professional, not playground, is to gently pull at the hair around the crown and the twists to loosen them, creating soft volume. A texture spray is our best friend here—it gives grip to clean hair and makes it look effortlessly undone.

    Skincare Prep with Drugstore Heroes

    We always start our event prep the night before. A hydrating sheet mask from Garnier (our favourite is the Moisture Bomb) gives us that plump, glowing canvas that makes makeup glide on seamlessly. On the day, we keep our skincare simple: a gentle cleanse, a hyaluronic acid serum from The Ordinary, and a lightweight but deeply moisturising cream. A smooth, well-hydrated base is the real secret to makeup looking expensive, and we’ve achieved it entirely with drugstore heroes.

    Real-Life Event Dressing Wins from Our Team

    We talk the talk, but we also walk the walk. Our team has navigated a whole calendar of UK events on a shoestring, and we’re pulling back the curtain on a couple of our favourite success stories to show you exactly how it’s done in practice.

    The Wedding Guest Look Under £50

    Last summer, our team member Chloe was invited to a countryside marquee wedding with a “garden party” dress code and a very tight budget. She started on Vinted and found a brand-new, floral midi dress from Monsoon with the tags still on for £18. The waist was a little loose, so a local tailor nipped it in for £12. She then found a beautiful, dusty-pink fascinator in the Accessorize sale for £8 and paired it with nude block heels she already owned. A vintage-style rattan bag from a charity shop for £4 completed the look. The entire outfit, perfectly tailored and theme-appropriate, came in at £42, and she received compliments all day long.

    A Black-Tie Affair on a Smart-Casual Budget

    When our editor, Sam, needed a gown for a black-tie awards dinner, she bypassed the designer floor and headed straight to the John Lewis clearance section online. She unearthed a floor-length, navy blue halter-neck gown from their own-brand collection, reduced from £150 to £35. The simple, classic cut looked incredibly expensive. She elevated it entirely with accessories: a pair of crystal drop earrings from Primark’s evening range for £6 and a sleek, silver box clutch from ASOS for £14. With her hair in a sleek low bun and a bold red lip, she looked every inch the part, and the entire look, including shoes she’d worn to a previous wedding, cost her just £55.

    Ultimately, we’ve found that the most stylish person in the room isn’t the one who spent the most money, but the one who looks the most comfortable in their own skin. Event dressing on a budget isn’t about deprivation; it’s a creative challenge that forces us to be more imaginative, more resourceful, and more authentically ourselves. We hope our little black book of tricks empowers you to say “yes” to every invitation, knowing you can pull together a look that makes you feel like the very best version of yourself, without the financial hangover the next day. Now go on, have fun with it, and work that high-street find like it’s haute couture.

    FAQ

    How can I make a cheap dress look expensive for an event?

    We always focus on three key things: fit, fabric, and finish. A quick trip to a tailor to perfect the fit instantly adds value. We swap out any cheap-looking belts or buttons for higher-quality replacements from a haberdashery, and we steam or iron the garment meticulously. Finishing the look with carefully chosen, layered costume jewellery and a structured bag completes the expensive-looking illusion.

    Is it acceptable to wear a second-hand outfit to a wedding?

    Absolutely, and we do it all the time! In our experience, the stigma around second-hand fashion has completely vanished. It’s sustainable, savvy, and often means you find a unique piece no one else will have. We always recommend being honest if someone asks where your stunning dress is from—a proud “It’s a Vinted find!” usually leads to a great conversation about bargain hunting.

    What are the best high-street shops in the UK for last-minute event outfits?

    For a last-minute panic, we head straight to Zara for modern evening wear, River Island for occasion dresses that are ready to go, and ASOS for its next-day delivery on a huge range. If we have time to pop into a physical store, the accessories section in Primark and Accessorize can completely save a simple outfit we already own.

    Can I really do my own event makeup that lasts all night?

    We promise you can. The secret, we’ve found, is all in the prep and the setting products. A gripping primer and a high-quality setting spray from Boots are non-negotiable. We also recommend cream products for blush and highlight, as they melt into the skin and fade more gracefully than powders, looking fresh in photos for hours.

    How do I plan an event outfit when I’m on a very tight budget?

    Our golden rule is to start with your own wardrobe first, shopping it with a friend for a second opinion. Once you’ve identified the one hero piece you might need to buy, set a strict budget and hunt for it across multiple platforms, checking Vinted and Depop before the high street. We always allocate a small portion of the budget for a tailor to make any necessary tweaks—it’s the step that makes the biggest difference.

  • Building a wardrobe for travel photography

    How We Build a Wardrobe for Travel Photography That Pops

    We’ve all been there—standing in front of an open suitcase, wondering why a wardrobe that feels so right at home suddenly looks all wrong for a trip. Packing isn’t just about filling a bag; it’s about curating a visual story. Every destination has its own colour palette, its own light, its own mood, and your outfits become part of that narrative. Our team approaches packing as an editing exercise, choosing pieces that work hard, photograph beautifully, and let you focus on the joy of the moment rather than fretting over what to wear.

    The Philosophy of a Photogenic Travel Capsule

    A suitcase bursting at the seams rarely translates to better photographs. We’ve learned that a tightly edited capsule, built around a clear visual intention, always outperforms volume. The secret lies in the interplay of structure, texture, and a considered colour story. We look to UK high-street heroes like Reiss for their sculptural tailoring and Me+Em for their clever, crease-resistant fabrics that hold their shape straight out of the case. These aren’t just clothes; they’re reliable tools for creating images that feel polished yet effortless.

    Before we even think about individual garments, we settle on a colour palette. We typically gravitate towards neutrals—cream, camel, charcoal, and soft sage—because they allow the location to breathe. A palette of three core colours plus one accent shade creates enough variety without visual chaos. This approach means every top pairs with every bottom, and layering feels intentional rather than haphazard.

    Loud prints and busy patterns tend to dominate a frame, pulling focus from the scenery. We favour fabrics that offer depth through texture instead—think chunky knits, pleated satin, or embroidered cotton. Movement is another silent ally; a skirt that catches a breeze or a coat that billows slightly adds life and energy to a static image. We reach for cable-knit jumpers and fluid silk skirts when we want photographs that feel layered and sophisticated.

    Hero Pieces That Anchor Every Destination Look

    Every successful travel wardrobe has anchors—those indispensable pieces that do the heavy lifting. For us, that means a statement coat, a versatile midi dress, and a pair of beautifully cut wide-leg trousers. These items set the tone for the entire trip and provide a reliable foundation. We often turn to quintessentially British labels like Burberry and Barbour for weather-proof yet undeniably stylish options that transition seamlessly from countryside walks to city evenings.

    If we could only pack one transformative item, it would be a coat. Outerwear frames every shot, often becoming the defining feature of a full-length photograph. A classic Burberry trench coat serves as a weather-proof hero piece that suits both urban and rural UK settings, its clean lines adding instant polish. For colder months, a woollen wrap coat in camel or deep forest green creates a cocoon of texture that photographs beautifully against Bath’s honey-hued stone or the rugged Scottish coastline.

    A midi dress is our secret weapon for one-and-done styling. We look for silhouettes with subtle movement—gentle A-lines, bias cuts, or tiered skirts—that animate on camera without overwhelming the frame. Me+Em offers structured, crease-resistant dresses that emerge from luggage looking fresh. A well-chosen midi in a solid jewel tone or soft neutral can be dressed up with heeled boots for an evening out or paired with trainers for a windy coastal ramble.

    Accessories and Beauty for the Perfect Shot

    Accessories and beauty choices are the punctuation marks of a travel look. They have the power to elevate a simple jeans-and-jumper combination into something that feels intentional and camera-ready. We focus on face-framing details and a consistent beauty formula that creates a signature threading through every image, giving your travel album a cohesive, editorial feel.

    Sunglasses, scarves, and earrings act as natural frames, directing the viewer’s eye exactly where you want it. We favour oversized tortoiseshell sunglasses that add retro glamour and a silk neck scarf tied around a ponytail, wrist, or bag handle. For handbags, we opt for leather goods that whisper rather than shout. A classic Mulberry bag adds instant polish without logos that distract. The aim is quiet luxury that enhances rather than competes with the scene.

    On-camera beauty relies on looking like the most radiant, rested version of yourself. Our team keeps skincare non-negotiable: a hydrating mist for the flight, a rich moisturiser to counteract hotel heating, and a luminous primer that catches light beautifully. For makeup, we keep it simple—a groomed brow, a sweep of bronzer, and a lip colour that brightens the whole face. Charlotte Tilbury’s Pillow Talk lipstick range offers that perfect balance of rosy-berry pigment that reads as your-lips-but-better through a lens.

    Packing Smart to Keep Clothes Camera-Ready

    There’s nothing more disheartening than arriving at a stunning location only to unpack garments that look like crumpled tissue paper. How you pack matters just as much as what you pack. We’ve abandoned traditional folding in favour of rolling, particularly for silks, jersey, and fine-gauge knits. This method minimises hard creases while maximising space. For structured pieces like blazers and trench coats, we turn them inside out, fold them gently along the back seams, and layer tissue paper between folds to reduce friction.

    Even with meticulous packing, some creasing is inevitable. A portable garment steamer is essential for shooting in historic UK hotels where ironing facilities may be limited. Many of our favourite properties—from Georgian townhouses in Edinburgh to coaching inns in the Cotswolds—tuck ironing boards away in cupboards or don’t provide them at all. Our emergency kit also includes a small sewing kit, fashion tape for securing necklines, and a sachet of travel wash for silk delicates needing a quick sink refresh.

    Adapting Your Wardrobe to Iconic UK Backdrops

    Britain’s landscapes are staggeringly diverse, and each region offers its own unique colour palette and quality of light. Dressing well for travel photography means understanding how your clothing interacts with these environments. We plan our looks around the locations we know we’ll be visiting, treating each backdrop as a collaborator in the final image.

    Cities like London, Bath, and Edinburgh present a backdrop of strong geometry—clean lines, historic stonework, and urban textures. Here, we lean into tailored silhouettes that echo that sense of structure. A sharply cut blazer over wide-leg trousers creates a long, lean line that complements the verticality of city architecture. The Cotswolds’ honey-coloured stone villages provide a warm, golden backdrop that complements neutral and earth-toned outfits, while Bath’s Georgian crescents call for classic, unfussy elegance.

    Rural backdrops demand a softer touch. When shooting in the Lake District or Peak District, we swap crisp poplin for flowing viscose and structured bags for woven baskets. Earth tones—rust, olive, ochre, and cream—harmonise with rolling hills and stone walls rather than fighting against them. Layering becomes functional as well as aesthetic; a lightweight cashmere jumper under a waxed jacket looks authentic and photographs with a timeless, storytelling quality.

    Building a travel wardrobe with photography in mind isn’t about vanity; it’s about freeing yourself to be fully present. When you trust your clothing choices, you stop fussing with zips and hems and start noticing the way morning light hits a canal or how mist clings to a distant hillside. Pack thoughtfully, dress with intention, and let the backdrop do the rest.

    FAQ

    How many outfits should I pack for a week of travel photography?

    We recommend a capsule of 10-12 core pieces creating at least 15 different looks. Focus on versatile neutrals, two pairs of trousers, a midi dress, two knitwear options, and one statement coat. Accessories handle variety, so pack silk scarves and jewellery swaps rather than extra garments.

    What colours photograph best against UK landscapes?

    Neutral and earth tones perform beautifully across most UK settings. Cream, camel, sage, and soft grey complement everything from Bath’s golden stone to Scotland’s moody highlands. Avoid neon shades and large, busy patterns that can overwhelm the scene and create colour casts on skin.

    Do I really need a portable steamer for travel?

    Absolutely. Many historic UK hotels and cosy B&Bs lack accessible ironing facilities, and a steamer weighs far less than an iron while being gentler on delicate fabrics. It’s the single most useful tool for ensuring your clothes look fresh and camera-ready after transit.

    Can I wear trainers and still look polished in photos?

    Yes, but choose carefully. Opt for clean, minimalist leather trainers in white or neutral tones that read as intentional rather than purely functional. Pair them with tailored trousers or a flowing midi dress, and avoid overly chunky or brightly coloured athletic styles.

    How do I stop my silk pieces from creasing in my suitcase?

    Roll silk garments loosely rather than folding them, and place tissue paper between layers to reduce friction. Hang them in the bathroom while you shower upon arrival; the gentle steam helps minor creases release naturally. A quick once-over with a portable steamer restores silk to its full lustre in seconds.

  • Hello world!

    Welcome to WordPress. This is your first post. Edit or delete it, then start writing!